On the wall in my office is a sign that says: “I only wear black because they haven’t invented a darker color yet”. Truth be told, I only wear black because I cannot match any colors. Not at all. I once wore a new black skirt for a full year before my daughter asked me “why are you wearing black shoes with that blue skirt?” This is why I stubbornly cling to black, and have no intention of wearing orange. I’ve no current plans for a felony conviction nor Buddhist monkhood.
I do, however, have some favorite orange things. In no particular order: Campfires. California golden poppies. The Lorax. Sunsets. Oompa loompas. Fred and George Weasley’s hair. The Golden Gate Bridge.
And Orange food? So many GREAT orange foods. Do you remember the Sunkist Orange TV commercial from the 1976? Talk about a great visual, you could practically smell the orange scent (like in Soaring Over California. But I digress.) Click the ‘watch now’ on the first one:
http://watchongadget.net/sunkist-oranges-1976-tv-commercial
I like papayas. (I think that mangos are sweet . . .) Orange sherbet. Ripe apricots. Pumpkin pie. Tobiko. Sweet potatoes. Velveeta. ORANGE SODA.
Which brings me to a confession: When my kids were young, there were days that I made an All Orange Dinner: Kraft Mac & Cheese, carrots, canned mandarin oranges, orange jello, and Cheetos. I’m not proud of that.
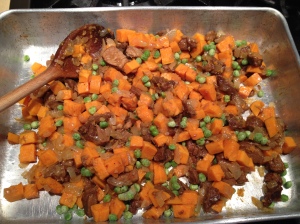
But this is a dumpling blog—so let’s consider the orange dumpling. I did actually make orange empanadas last Halloween—I went to all the trouble of making carrot puree for the crust, filled them with butternut squash and bbq pork and peas—but in the end you couldn’t even tell they were orange in color after baking.
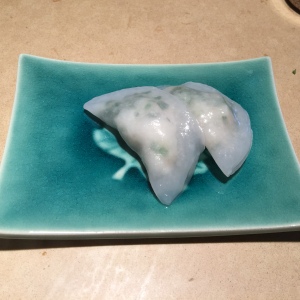
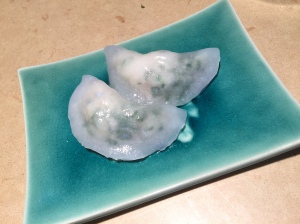
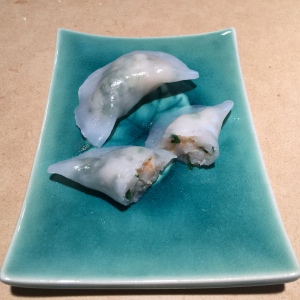
Which brings me to shrimp dumplings. (Now THAT was a contrived intro if I’ve ever seen one.) I based this on Andrea Nguyen’s recipe for Har Gow and instead of forming satchels and steaming, I formed half moons and boiled the dumplings. (spooked by a previous attempt, see ‘nemesis’ post).
Boiled Shrimp Dumplings (Adapted from Andrea Nguyen’s Asian Dumplings recipe for Har Gow)
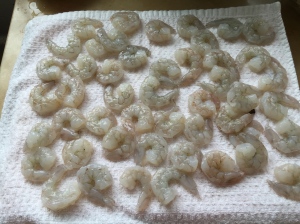
2/3 pound medium shrimp, shelled and deveined. (I buy from my local Chinese market, where the seafood is very fresh, and they are already peeled and deveined. Saves loads of time). Dump the shrimp in ice water for a good rinse, then drain and pat dry on paper towels.
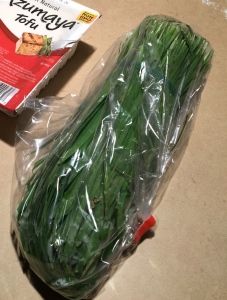
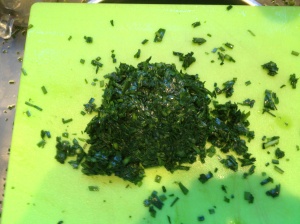
Garlic chives—Jiu Cai or Gau Choy, available at your Asian market—purchase golden for a uniformly pink/orange dumpling, or green for that lovely contrasting color. I used about half of a bunch of garlic chives. Andrea’s recipe (and other traditional recipes) call for bamboo shoots, but the canned bamboo shoots ruined the filling (see “My Nemesis” post) and I prefer the chive flavor.
½ tsp salt
1.5 ounces pork fat or fatty bacon. (I’m sure this is amazing but I left it out)
1 ½ tsp cornstarch
¾ tsp sugar
1/8 tsp white pepper
1 ½ tsp rice wine
1 tsp sesame oil
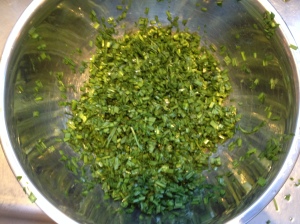
Cut the bottom 3 inches off the garlic chives and discard. Wash the chives well in a large bowl of cold water and drain, shaking off excess water. Holding the chives in a bunch, cut across in ¼ inch lengths. Place chives in a bowl, sprinkle liberally with salt, and mix, squeezing to release the water from the chives. Place the weeping chives on a clean dish towel, wrap, and twist over the sink, squeezing out the liquid so the chives are fairly dry.
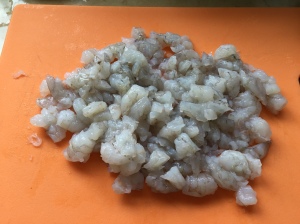
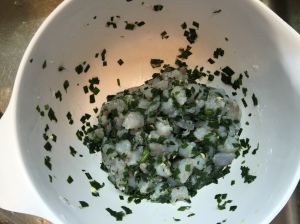
With a sharp knife, coarsely chop the shrimp, keeping many pieces fairly large, as you want to showcase the beautiful shrimp in the dumpling.
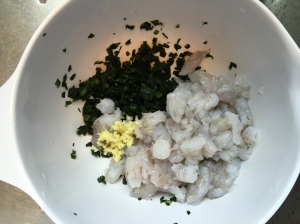
Mix in chives, salt, pork fat, cornstarch, sugar, pepper, wine and sesame oil. Refrigerate while you make the dough.
Wheat Starch Dough
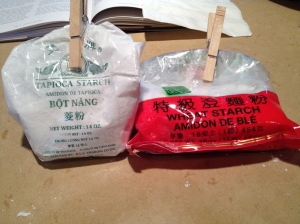
1 cup + 2 tablespoons wheat starch
½ cup tapioca starch
1/8 tsp salt
3/4 cup + 2 tablespoons boiling water
4 tsp canola oil
Mix wheat starch, tapioca starch, and salt in a bowl. Add hot water and stir vigorously. Once it starts to hold together, add the oil and stir, working in the oil. If the dough is dry, add a bit more water. If the dough is too wet, add more wheat starch. Knead until fully mixed. The dough should be firm and pliable, not crumbly or soft and pasty.
NOTE: The consistency of this dough has to be just right. Work the dough with your hands– it should be like malleable playdough. Not too dry–It needs to be moist enough to hold together without crumbling when you flatten a small amount into a quarter size disc. And not too wet, or it will fall apart as well. I know this because I’ve made this dough several times and did not get it right the first three times. Let’s just say there was cursing involved. I made it again today and added wheat starch 6 times before I got the right consistency. PERSEVERANCE. The wrappers turned out great, for the first time. You really have to work the dough with your hands and get the right feel.
When made properly, this dough has a fabulous texture, and is a pleasure to have in class.
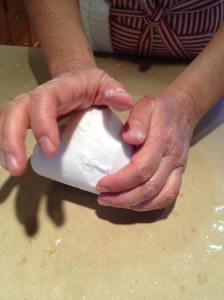
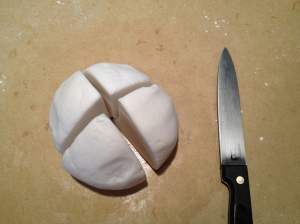
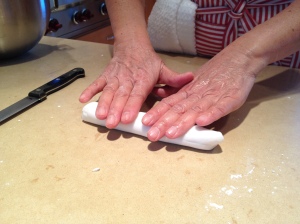
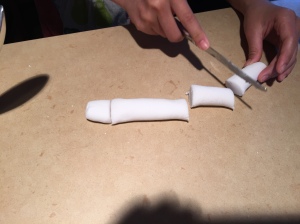
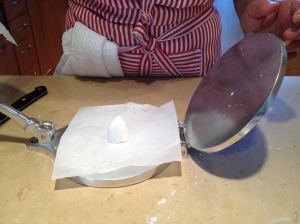
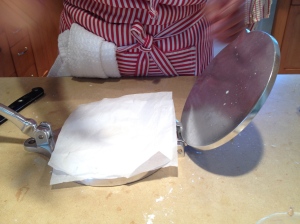
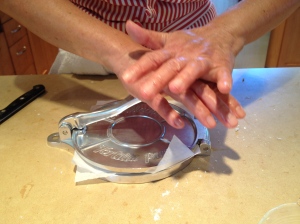
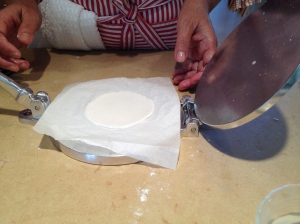
Cut parchment paper into 4×4 inch squares. You only need 2 squares, you can re-use the same paper for each wrapper. Let the dough rest for 10-20 minutes, covered with plastic wrap to prevent drying. Cut the dough into 4 pieces. Form one piece into a log and cut into 8 pieces. To flatten the dough into a disk, you can either roll it with a rolling pin between 2 squares of parchment paper, or use a tortilla press. To use the tortilla press, place the parchment on the press, then a round of dough, then place a 2nd piece of parchment on the dough and flatten slightly with the palm of your hand. Use the tortilla press to flatten into a disc.
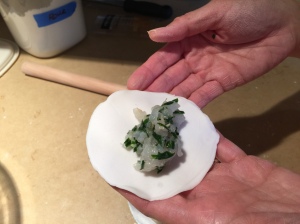
Careful readers of my blog will notice these pics are recycled from an earlier post.
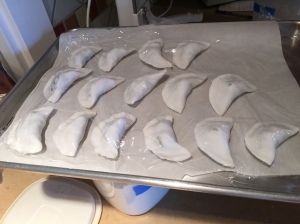
Place 2 tsp filling (or less) into the disc, then fold in half and pinch to seal. This dough does not stretch—it will break if you use too much filling, so do not overstuff. Place dumpling on baking sheet lined with wax paper, and proceed with the rest of the dough and filling. These can be covered loosely with plastic wrap and refrigerated for a couple of hours. If you (a) made the dough too wet, or (b) the filling is too wet, the dough will stick to the paper and you will have a hard time repairing the dumplings. I do not recommend freezing these. I once made too many and froze them. When I cooked them frozen, then the skin overcooked and dissolved before the shrimp cooked through. When I thawed them first, on a parchment lined baking sheet, the moisture from freezing/thawing caused the dough to become soggy and stick to the parchment and I had a hard time repairing the dumplings.
Make Scallion oil: 1 bunch of scallions, trimmed, washed, and thinly sliced 5 tablespoons vegetable oil Heat oil and scallions until scallions are wilted. Let cool and place 1 tablespoon of scallion oil onto each of 2 serving plates and spread it around with the back of a spoon
Make dipping sauce: 1:1:1 soy sauce/sugar/vinegar, bring to a boil then let cool — or any type of chile or Asian dipping sauce you prefer.
Bring a large pot of water to a boil. Gently place 16 of the dumplings in the water and bring back to a boil, then turn down to medium so the water is not boiling too vigorously, which can break the skins. These cook quickly, just about 3 minutes. Pull one out and cut in half to make sure the shrimp is cooked through, then remove with a slotted spoon to the prepared scallion oil plate. Spoon one tablespoon of the reserved scallion oil over the top of the dumplings and serve immediately with dipping sauce. Repeat with the other 16 dumplings.
Observations: This dough turns from opaque to translucent. However, if you wait for the skin to turn fully translucent before removing from the pot, you will overcook them and the skin will dissolve. The skin continues to turn clear after cooking.
Critique: These are Uber popular, everyone loves them. “Wow!” “How did you make these?” “These are SO GOOD!”
Unlike many of the other dumplings I’ve made, these required several attempts to get them right. The dough was MOST uncooperative. I overcooked them several times, to my great dismay as I watch the skins dissolve while trying to plate them. In the end, they are definitely worth the multiple tries, and are now part of my standard repertoire. And did I mention? Equally delicious whether I’m wearing a little black dress, or my Slytherin Robe.
More Recipes for Orange Food:
The following are some of my favorite non-dumpling orange recipes. They have never failed me.
Mrs. Shumpert’s Sweet Potatoes
My first Thanksgiving away from home, I was invited to Paul Shumpert’s house for dinner in Marietta, Georgia. His mother made a fabulous dinner and served these yams. I have made them for Thanksgiving every year since then, 34 years. They are the best thing on the table. True story: I once brought them to a pot luck at work. The recipe was disseminated, and for several months and even years after, I had total strangers come up to me in the hospital and tell me “I made your sweet potatoes. They are amazing.”
4-5 large Jewel yams (about 4 pounds) (orange flesh, pinkish brown skin)
¾ cup sugar
½ cup milk
1 stick (1/2 cup) butter
2 eggs
2 tsp vanilla
Topping:
1 ½ cup chopped pecans
1/3 cup melted butter
2/3 cup flour
¾ cup brown sugar
Peel yams and cut into large chunks. Boil for approximately 20 minutes, till tender to a fork. Drain but do not rinse. Mix together milk, eggs, sugar, and vanilla. Add butter and milk mixture to hot yams and mash together till smooth. Pour into 9×13 pan.
Mix topping ingredients together. If it’s a little wet, add more flour till crumbly. Sprinkle on top of the yams. Bake 45 minutes at 350 degrees.
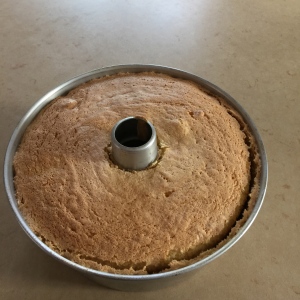
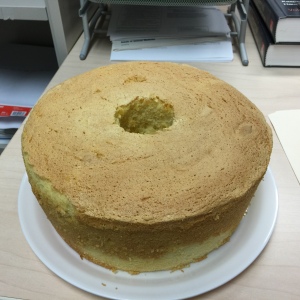
Orange chiffon cake
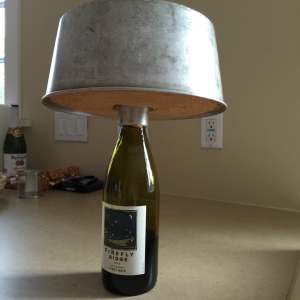
My cousin Frances brought this cake to a family event a few years back, and she was gracious enough to share the recipe with me. One of the best food compliments I’ve received was when my friend’s teenage daughter took a bite and said: “Well, that’s just a little taste of heaven, isn’t it?” This cake is one of my most reliable recipes; perfect every time, not temperamental. It rises beautifully and has great loft, tenderness, and flavor. Make sure you turn the cake upside down as soon as you take it out of the oven, and let it cool perched upside down on the neck of a champagne bottle. I’ve actually never made the accompanying frosting since I’m a plain cake kind of gal, but it looks easy and delicious.
For the cake:
2¼ cups cake flour
1½ cups sugar
1 Tbsp. Double-acting baking powder
½ tsp. Salt
½ cup vegetable oil
5 large egg yolks
¾ cups fresh orange juice
2 Tbsp. Freshly grated orange zest
2 tsp. Vanilla
8 large egg whites
1 tsp. cream of tartar
For the whipped cream frosting:
2 cups well chilled heavy cream
3 Tbsp. Grand Marnier or other orange-flavored liqueur
2 tsp. freshly grated orange zest
¼ cup sugar
¼ tsp. Orange-flower water
Making the cake:
Into a large bowl sift together the flour, ¾ cup of sugar, baking powder, and salt. In a bowl whisk together the oil, egg yolks, orange juice, zest and the vanilla; then whisk the mixture into the flour mixture, whisking until the batter is smooth. In another large bowl, using the electric beater, beat the egg whites with a pinch of salt until they are foamy, add the cream of tartar and 1/4 cup sugar, and beat the whites until they hold stiff glossy peaks. Stir one third of the egg whites into the batter to lighten it, then fold in the remaining whites gently but thoroughly. Spoon the batter into an ungreased 10-inch tube pan (with removable bottom) and bake the cake in the middle of a pre-heated 325°F oven for 1 hour and 10 minutes or until the tester comes out clean. Invert the pan immediately onto a heavy wine or champagne bottle and let the cake cool completely in the pan upside down. Once cool, run a long thin knife around the outer, bottom and tube edges of the pan and turn the cake out of the pan onto a serving plate.
Notes: do NOT grease the pan or your cake will not rise. Turn it over immediately after removing from the oven and let it cool upside down; this stretches out the cake so it’s light instead of dumpy.
Making the cream frosting:
In a large bowl, chilled, with an electric mixer beat together the cream, the Grand Marnier, the zest, the sugar, the orange flower water, and a pinch of salt until the mixture hold stiff peaks. Spread the frosting on the top, and side of the cake. Garnish the cake with orange sections if desired.
Pumpkin bread
I don’t recall where I got this recipe; I’ve made it for over 30 years. It’s another ‘perfect every time’ recipe, and turns out consistently moist, flavorful loaves.
2/3 cup butter
2 and 2/3 cup sugar
4 eggs
2/3 cup water
2 cups canned pumpkin
3 1/3 cup flour
2 tsp baking soda
1 ½ tsp salt
½ tsp baking powder
1 tsp cinnamon
1 tsp allspice
½ tsp nutmeg
1 tsp cloves
Preheat oven to 350 degrees.
Grease and flour two 8 x 4 loaf pans
Cream butter and sugar, beating till light and fluffy. Add eggs, one at a time, beating well after each.
Mix flour, baking soda, salt, baking powder, and spices together.
Add half of the flour mixture to the butter mixture and mix well. Add Pumpkin and water and mix well. Add the remaining flour mixture and mix well.
Pour batter into 2 pans
Bake 65-75 minutes, till toothpick comes clean.
